Contents
Coffee lovers know that the best way to get that perfect cup of joe might just be to make it yourself at home. There are a variety of ways to brew your own, but did you know that there is a fast and inexpensive way to roast your own beans?
While you may not have heard of this method before, a hot-air popcorn popper might be the quickest, simplest way to roast your own coffee beans from the comfort of your own home.
It’s important to remember that this is a DIY project that comes with some risk, and may require trial and error before getting it right. In the end, it could yield a delicious cup of coffee and give you a new appreciation for the effort and care that goes into the roasting process.
Read More:
- Best Dunkin Donuts Coffees
- Best Bizzy Organic Coffee
- Best Starbucks Coffees
- Best Espresso Coffees
- Best Medium Roast Coffees
How to Roast Coffee Beans in a Popcorn Popper?
What You’ll Need:
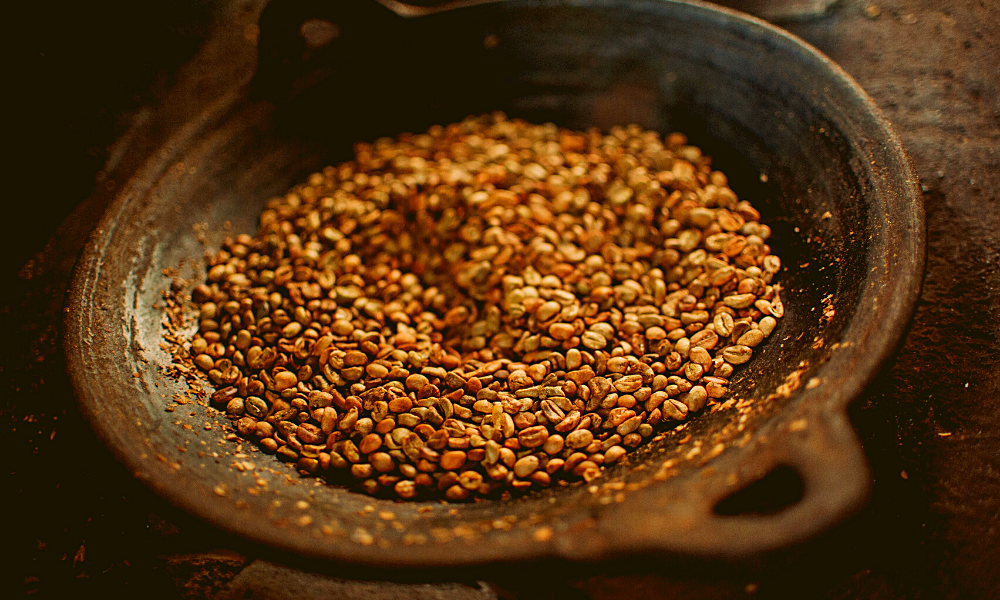
- Green coffee beans. These can be purchased directly from a retailer or coffee roasting company but can be difficult to find depending on where you live. If you are having trouble finding a distributor in your area, you can find unroasted beans from many online retailers.
- Hot air popcorn popper. These can often be found at a secondhand store or garage sale at a low price.
- Container to catch the chaff. This is the waste product, the skin from the coffee fruit, that has a paper-like consistency. It will detach from the beans during the roasting process. This will remind you a lot of the paper-like bits that come off of a partly popped kernel of popcorn.
- Large spoon. It’s important that the spoon has a long handle to keep your hand away from the heat of the popper.
- Metal colander for cooling the beans after roasting.
- Oven mitt for handling the popper after the roasting is done. It will be hot!
- This is optional, but helpful if this is your first time using this method.
Before Roasting
If you are roasting your coffee indoors, find a well-ventilated and well-lit area — for example, on the stove with the vent and the light on. You are going to want to see the color of the coffee beans, as the color change is an indicator that they are roasting properly. If you can find a place with an overhead light, that is best.
Otherwise, for safety, it is recommended to take your popper and materials outside to a clean, flat surface nearby an electrical outlet. If you are taking your setup outside, be aware of the ambient temperature. If the weather outside is too cold or too hot, this could affect how your beans roast.
Please note: DO NOT leave the popper unattended under any circumstances. This method carries a high risk of smoke and fire if you are not monitoring it. The popcorn popper can reach temperatures of 475 degrees Fahrenheit.
What is “Cracking?”
During this process, you are going to need to note when the “first crack” is. This will sound a lot like popcorn popping: it is when the beans expand and moisture evaporates, creating steam that cracks open the bean.
Being able to identify when your coffee beans crack is key to understanding the roasting process. In the future, with practice, you will be able to identify your ideal level of roast on your coffee beans, and at which point in the cracking process that is achieved.
- For a light roast, you should expect to roast the beans for about 5-7 minutes in the popper, and 7-8 minutes for a dark roast. Every minute matters in this process, which is another reason to never leave the beans unattended while they are roasting.
- Do not roast past the second crack. A good rule of thumb is if your beans look dark and oily, which you will also be able to smell in the process, you have roasted too far. They will have a charcoal flavor at this point, which is less than ideal.
After Roasting
Let your coffee beans cool after roasting, and then transfer them to an airtight container. Let them rest for at least 12 hours before brewing your delicious cup of coffee, as to not interrupt the degassing process. Letting them rest for even longer, for a couple of days, can ensure this process is complete.
When you are roasting coffee, carbon dioxide forms inside the bean and needs time to be fully released. You won’t consume “bad” coffee if you can’t wait, but your coffee may be extracted unevenly and not come out as expected.
Read More:
- Making Coffee Camping: The Ultimate Guide To Camp Coffee
- Best Manual Coffee Grinders
- Ninja Hot and Cold Brewed System Review
- 10 Best Under Cabinet Coffee Makers
- Best French Press Coffee Makers
Tips and Tricks
Always monitor your popper closely, even if you have roasted coffee this way before. There are many factors that can impact how long your coffee will be roasting before it’s ready, such as:
- The ambient temperature of the surrounding space
- The size of the beans
- How much water the beans are holding
- The type of popcorn popper you are using
Step By Step Instructions
1) Set up your workspace with everything you need at hand so you won’t need to step away during the process.
a) The container to catch the chaff should be placed under the spout. Think: where the popcorn would pop out of and fall into the bowl.
2) Take measurements. This depends on the size of your popcorn popper, but three to four ounces of beans should be enough. Keep in mind that packing your popper with too many coffee beans can impede the process– they may not cook evenly if they cannot circulate enough. When they are done roasting, they will lose 30-40 percent of their weight, as the water evaporates out, yielding what feels like less than you started with. If you want a larger quantity, simply make two or three batches back to back.
3) Turn your machine on and wait about 30 seconds for it to heat up.
4) Pour your green beans into the chamber. They should start circulating slowly, and while this is happening, use the handle of the spoon to stir them. They should start to turn from green to a tan color, and this is when the lid to your popper should be put on to retain heat inside. At this point, you can stop stirring.
5) Watch as the chaff gets popped out into the container. This indicates that first crack is coming soon– a couple of minutes into the process.
6) Listen for the first crack. It sounds just as the name indicates: a crack. It should sound like a crackling fire. Make note of this, and shut off the popper when you’ve achieved the roast you want.
a) The first crack occurs between three and five minutes into the roasting process and yields a light roast. Medium roast coffee will be achieved between the first and second crack, and a dark roast is complete right after the second crack. Again, do not roast past this, otherwise, your beans will become oily and burnt. Much like burnt popcorn, you want to avoid this.
b) If you are using a thermometer to help gauge when your beans are ready, you should get a read of about 420 degrees Fahrenheit at first crack.
7) Finishing up. Once you’ve reached your ideal roast, shut off the popper, remove the top, and (while wearing your oven mitts!) pour the beans into your metal colander. Agitate the beans to remove any outlying chaff and to aerate them.
8) Let them rest for about 12 hours as they degass, and then place in an airtight container away from direct sunlight. In a couple of days, they’ll be ready for you to enjoy!
a) You should consume them within a week for peak freshness.
Read More:
- Maple Syrup In Coffee: Healthy Ways to Sweeten Your Coffee
- Spice Grinder vs Coffee Grinder: The Differences
- How Many Calories Are In a Cup of Coffee?
- When Is The Latest Time To Drink Coffee And Not Lose Sleep?
- How To Drink Black Coffee And Actually Love It
Troubleshooting Common Issues
● If your popper doesn’t seem to get hot enough, you may need to move your setup to a warmer location. Or, there may be an issue with your popper, especially if you obtained it secondhand. It may just be too old and too worn to have the power to roast your beans…in which case, it might be time to invest in a new popper from the store.
● Other electrical issues could affect your popper. Are you running it in the kitchen with other appliances at the same time? Try a different outlet!
● If your popper does seem to be heating properly, but the beans are not roasting to your liking, this may be an issue of batch size. Try a smaller amount– the beans should have enough room to circulate and allow an even roast.
● If you are having the opposite problem and your beans are roasting too quickly, try a larger batch size. Or, try reducing the voltage by plugging in your popper to an extension cord instead of the wall outlet directly.
In conclusion, if you love coffee, you are going to love the control you have over the roast if you choose to DIY this process at home. Do your research, invest in a quality popcorn popper, and take safety into consideration at all times. This process may take some trial and error, but in the end, it’s fun and enjoyable.

